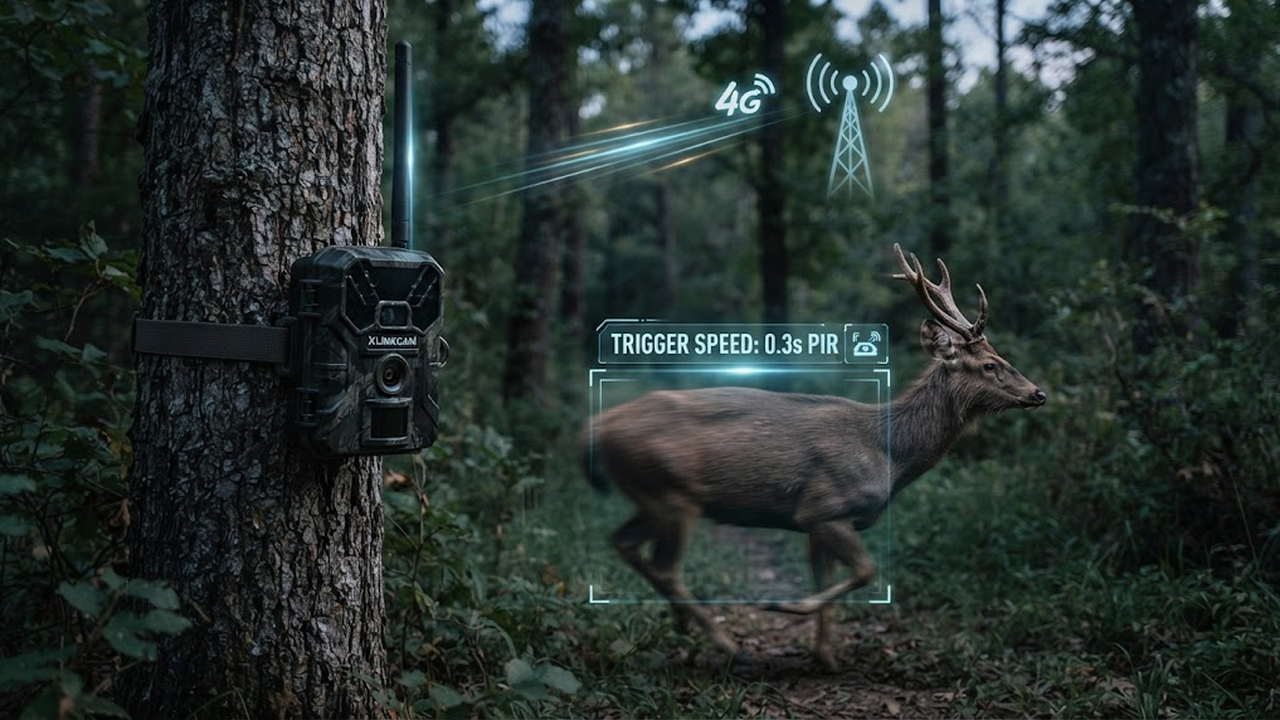
Why two numbers decide whether you get the shot
When an OEM or ODM buyer sits down to specify a cellular trail camera, the spec sheet is long — resolution, video, connectivity, battery, certification. But if the camera's job is to catch a moving animal, two numbers sit above the rest: trigger speed and PIR sensitivity. Together they set the miss rate: the share of animals that cross the frame and never appear in a photo. Everything else is detail. This guide is written for buyers who specify detection performance, not for end users, and it explains what the headline figures actually measure, where they are measured, and what to put in an RFQ so the camera your brand ships matches the promise on the box. For the broader sourcing picture, our OEM/ODM manufacturer guide shows how detection specs sit inside a full procurement.
Trigger speed, defined
Trigger speed is the time from the moment the PIR sensor decides "there is a target" to the moment the shutter fires the first frame. It is quoted in fractions of a second. Across current cellular trail cameras, the common working trigger sits around 0.3s. Below roughly 0.3s the gains in real catch rate shrink quickly, because PIR detection angle and timing dominate the miss rate — not the last fraction of shutter latency. Specifying sub-0.1s is rarely worth the engineering cost for most deployments, so 0.3s is a sensible working floor rather than a number to keep beating. The default trigger interval — the recovery time before the next shot — is typically 1 second, adjustable to 5/10/30 seconds or 1 minute, with burst capture up to 9 shots per detection. If you are new to the category, our cellular trail camera explainer sets out how the rest of the system fits together.
Why the number matters is simple arithmetic. A whitetail deer moving at 30 mph covers roughly 13 feet in 0.3 seconds. A faster animal, or a longer trigger, and the photo you keep is of a tail disappearing into the trees. The trigger speed is the floor on how quickly the camera can react.
What "0.3s" does not include
The honest part — and the part most brochures skip — is that the quoted trigger speed is only the shutter latency. It does not include three things that dominate real-world capture:
- PIR pre-detection lead time. Before the shutter can fire, the PIR must first register a heat signature and classify it as a target worth photographing. That decision takes time too.
- Wake-from-standby. A camera drawing 0.2mA in standby has to wake the lens and sensor before it can shoot. Weak batteries stretch this out.
- Target travel during detection. The animal keeps moving while the PIR is deciding. By the time the first frame lands, a fast target has already crossed part of the frame.
So the real capture latency is trigger speed plus PIR reaction plus travel — and the 0.3s on the box is a best-case floor measured at close range, moderate temperature and fresh cells, not the field average. Temperature matters: PIR sensitivity drops at temperature extremes, which lengthens effective detection and pushes the real number up.
Recovery time and burst: the number nobody quotes
After the first shot, the camera needs a recovery interval before the next. The default is commonly 1 second. For a single walking animal that is plenty. For a sprinting herd or a fast burst, the interval — not the trigger speed — decides how many usable frames you keep. Specifying burst count (up to 9 shots) and the shortest practical interval is often more important than shaving another tenth off the trigger, because the trigger is already at the floor.
PIR: the sensor that starts everything
PIR stands for Passive Infrared. The sensor detects changes in heat-in-motion across a zone in front of the camera; it does not "see" like a lens, it senses thermal change. A typical single-PIR unit covers about 120° horizontally and detects out to roughly 20–30m, depending on the model tier. Night illumination is a separate job — the IR LEDs only light the scene; they do not detect anything. More LEDs means a brighter night picture, not a wider detection zone; our no-glow vs low-glow guide covers which IR type suits which deployment.
The real tuning knob is sensitivity. A higher setting catches smaller and slower targets, but it also trips on swaying vegetation and temperature swings, raising the false-trigger rate. Lower sensitivity calms the inbox but risks missing a slow, small or cold target. This balance — miss rate versus false rate — is where most of the real-world performance lives, and it is a setting, not a fixed spec.
How trigger speed and PIR combine to set the miss rate
The two specs are not independent. A wide 120° PIR with 30m range gives the camera early lead time: it sees the target coming and starts the detection decision before the animal is on top of the lens. A 0.3s shutter then closes the capture. Narrow the PIR or shorten the range and the same 0.3s shutter will miss more edge and fast targets, because the detection decision starts too late. Specifying both together — angle, range and trigger — is what separates a camera that "almost got it" from one that always gets it.
Why multi-PIR and 180°/360° lenses are about angle, not speed
This is the point most spec sheets get backwards. Adding a second or third PIR — or moving to a 180° / 360° multi-lens arrangement — does not make the shutter fire faster. The trigger speed stays at the same 0.3s floor. What changes is the sensing angle. Our technology overview explains how the detection chain is built; the short version is that extra PIRs widen the zone, they do not quicken the shutter.
A single 120° PIR sees a cone in front of the lens. An animal that enters from the side, circles behind cover, or crosses at the edge of the frame can be outside that cone at the moment the shutter fires — so the camera captures an empty frame, or reacts only after the target has already passed. Multi-PIR widens that detection cone; 180° and 360° multi-lens setups extend coverage around the whole perimeter. The detection starts earlier and over a wider arc, so when the 0.3s shutter fires, the lens is pointed where the animal actually is.
That is the whole reason 180° and 360° multi-lens, multi-PIR 4G hunting cameras exist: to attack the empty-photo problem — the shot that fires but catches nothing — by maximizing coverage rather than by shaving an already-minimal trigger time. If your deployment loses photos to animals approaching from the side or from behind, more PIR and wider lenses will help far more than a faster trigger ever could.
False triggers and how to manage them
A PIR cannot tell a deer from a sun-warmed rock or a waving branch. On non-AI models the only levers are sensitivity and placement. On models with on-device intelligence, an NPU classifies Human / Vehicle / Wildlife so the junk stays off your feed. How AI is changing trail cameras covers this filtering in practice, and it is worth specifying explicitly rather than hoping sensitivity alone solves the empty-inbox problem.
Trigger speed & PIR: a comparison across configurations
| Configuration | PIR coverage | Trigger speed | What it solves | Empty-photo risk |
|---|---|---|---|---|
| Single PIR (standard) | ~120° | ~0.3s | Frontal approach in a narrow lane | High at edges / from behind |
| Single PIR, extended range | ~120° / 30m | ~0.3s | Earlier lead time on the same arc | Medium at edges / from behind |
| Multi-PIR (180°) | ~180° | ~0.3s | Wide side coverage, fewer edge misses | Lower at sides |
| Multi-lens / 360° multi-PIR | ~360° | ~0.3s | Full-perimeter coverage, anti empty-photo | Lowest overall |
The uniform ~0.3s across every row is the point: the trigger digit barely moves, while coverage — the thing that actually changes your catch rate — swings from a narrow front cone to a full perimeter. When you compare suppliers, ask for the measured miss rate at a defined target speed and distance, not just the brochure trigger; our MMS vs SMTP vs FTP comparison covers the delivery side separately.
The configurations above describe how detection behaves in principle. For a concrete MMS trail camera that ships with these trigger-speed and multi-PIR options, the product range is the most direct way to turn this spec into a procurement line item.
What to put in the RFQ
For a detection-spec RFQ that a factory can actually build to, list these and define the test:
- Trigger speed — best-case figure and the test conditions (range, ambient temperature, battery state) it was measured under. Below ~0.3s the field gain is small because detection angle and timing dominate, so treat sub-0.1s marketing claims with care rather than as a must-have.
- Recovery / trigger interval — shortest settable interval and default.
- PIR angle and detection range — horizontal coverage and maximum reliable range, and whether multi-PIR is available for wider arcs.
- Adjustable sensitivity — how many steps, and whether it is per-model tunable.
- Operating temperature range — because PIR sensitivity is temperature-dependent.
- Burst count — shots per detection.
- Target-speed miss rate — ask the factory for measured capture rate at, say, 30 mph and 25ft, not a single lab number.
If your buyers care about connectivity or night mode, those are independent choices — our BYO-SIM guide and cellular vs Wi-Fi piece explain the options, so this article stays on detection.
Talk to us
If you are specifying detection performance for your own brand, tell us the target speed, the deployment and the miss rate you need — we will map it to a model and a tuning profile. Talk to our team for a 24-hour quote, or start from our technology overview for the detection context behind a spec.